
This Core Exercise will teach you how to animate the camera to follow a target, imitating a classic tracking shot used in film-making. In the real world, the camera would be attached to a rail, which we won’t need in 3D space. This exercise will require that you limit animation of the camera to imitate the ‘classic’ tracking shot. Quoting from the Wiki:
The tracking shot can include smooth movements forward, backward, along the side of the subject, or on a curve. Dollies with hydraulic arms can also smoothly “boom” or “jib” the camera several feet on a vertical axis. Tracking shots, however, cannot include complex pivoting movements, aerial shots or crane shots.[4]
The complex pivoting movements, aerial shots or crane shots are often a hallmark of 3D Motion work, and usually always in a good way. This exercise is about control, and building mood through composition, lighting and atmosphere in addition to the movement of the camera.
For this exercise, I have supplied you with the atmosphere and the object to be followed by the camera here – CitySceneKit.c4d
Basic Steps are:
1. Set up your scene at half-resolution using the HDTV 1080 25 setting as shown in this screen shot. To halve the resolution, check the Lock Ratio button, and then divide the Width by 2 by putting a /2 after the 1920 and hitting Return.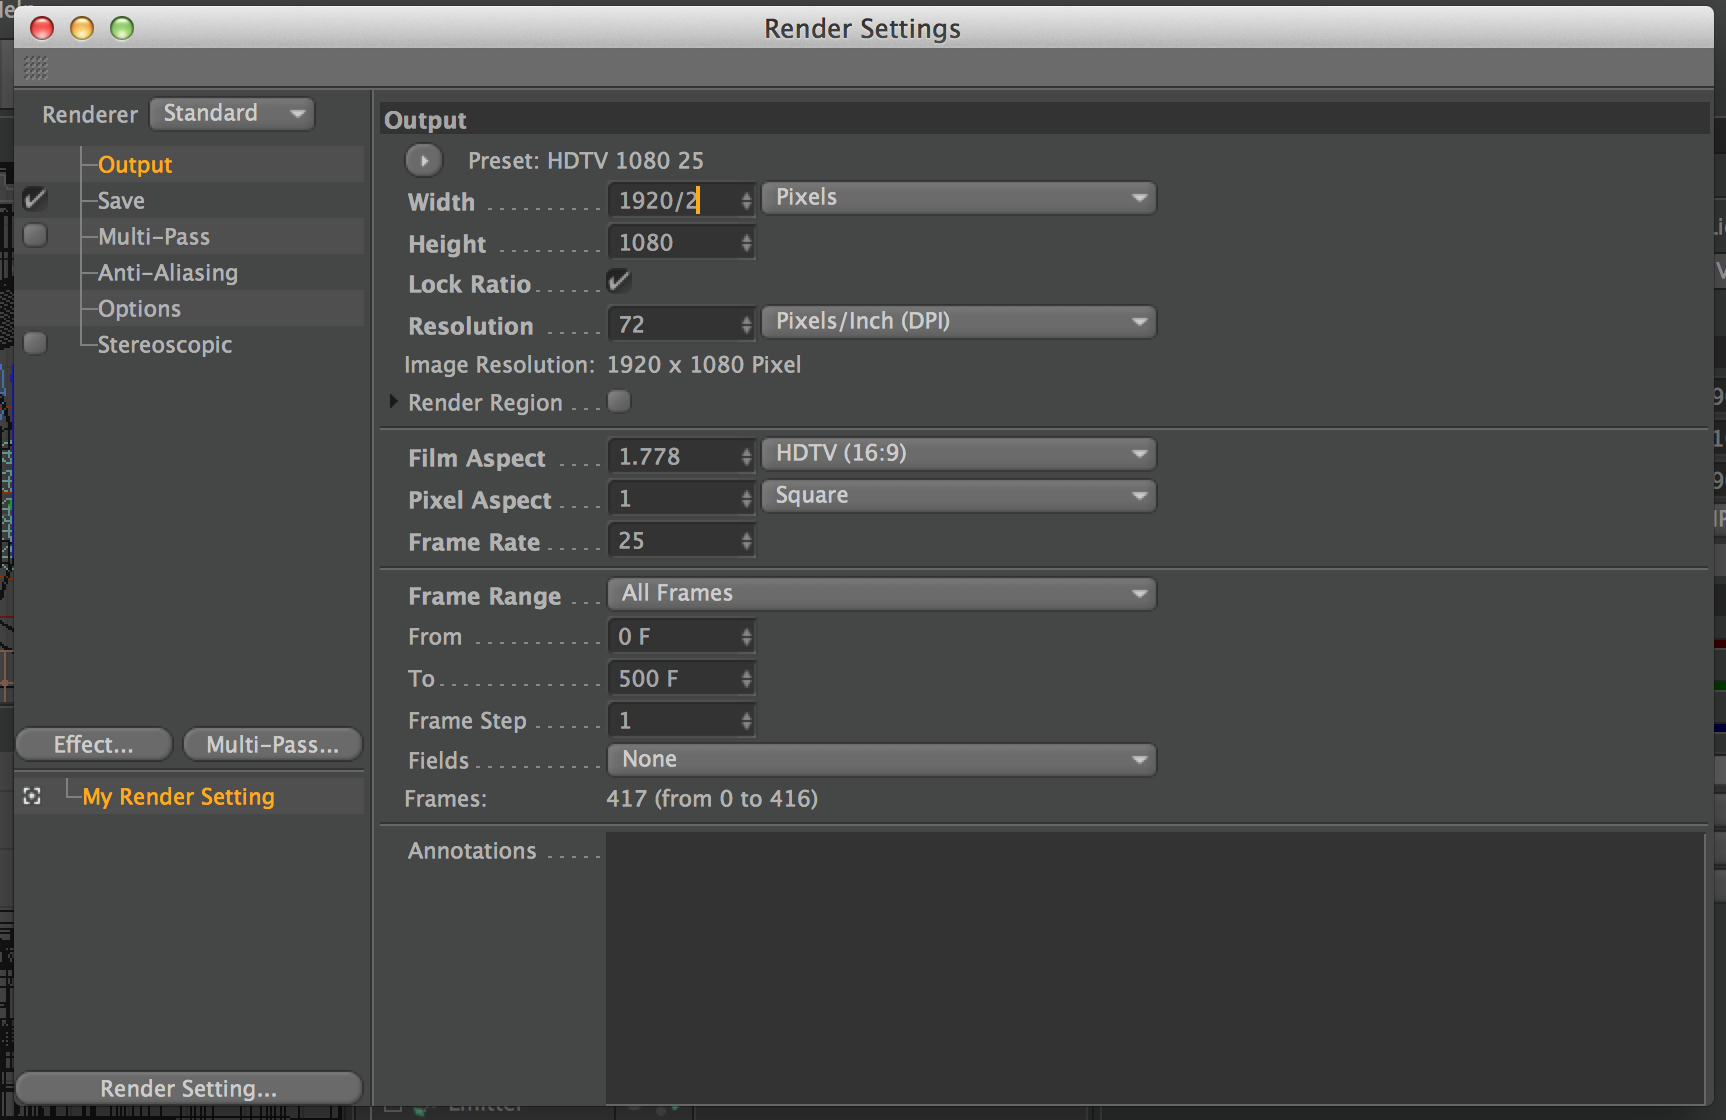
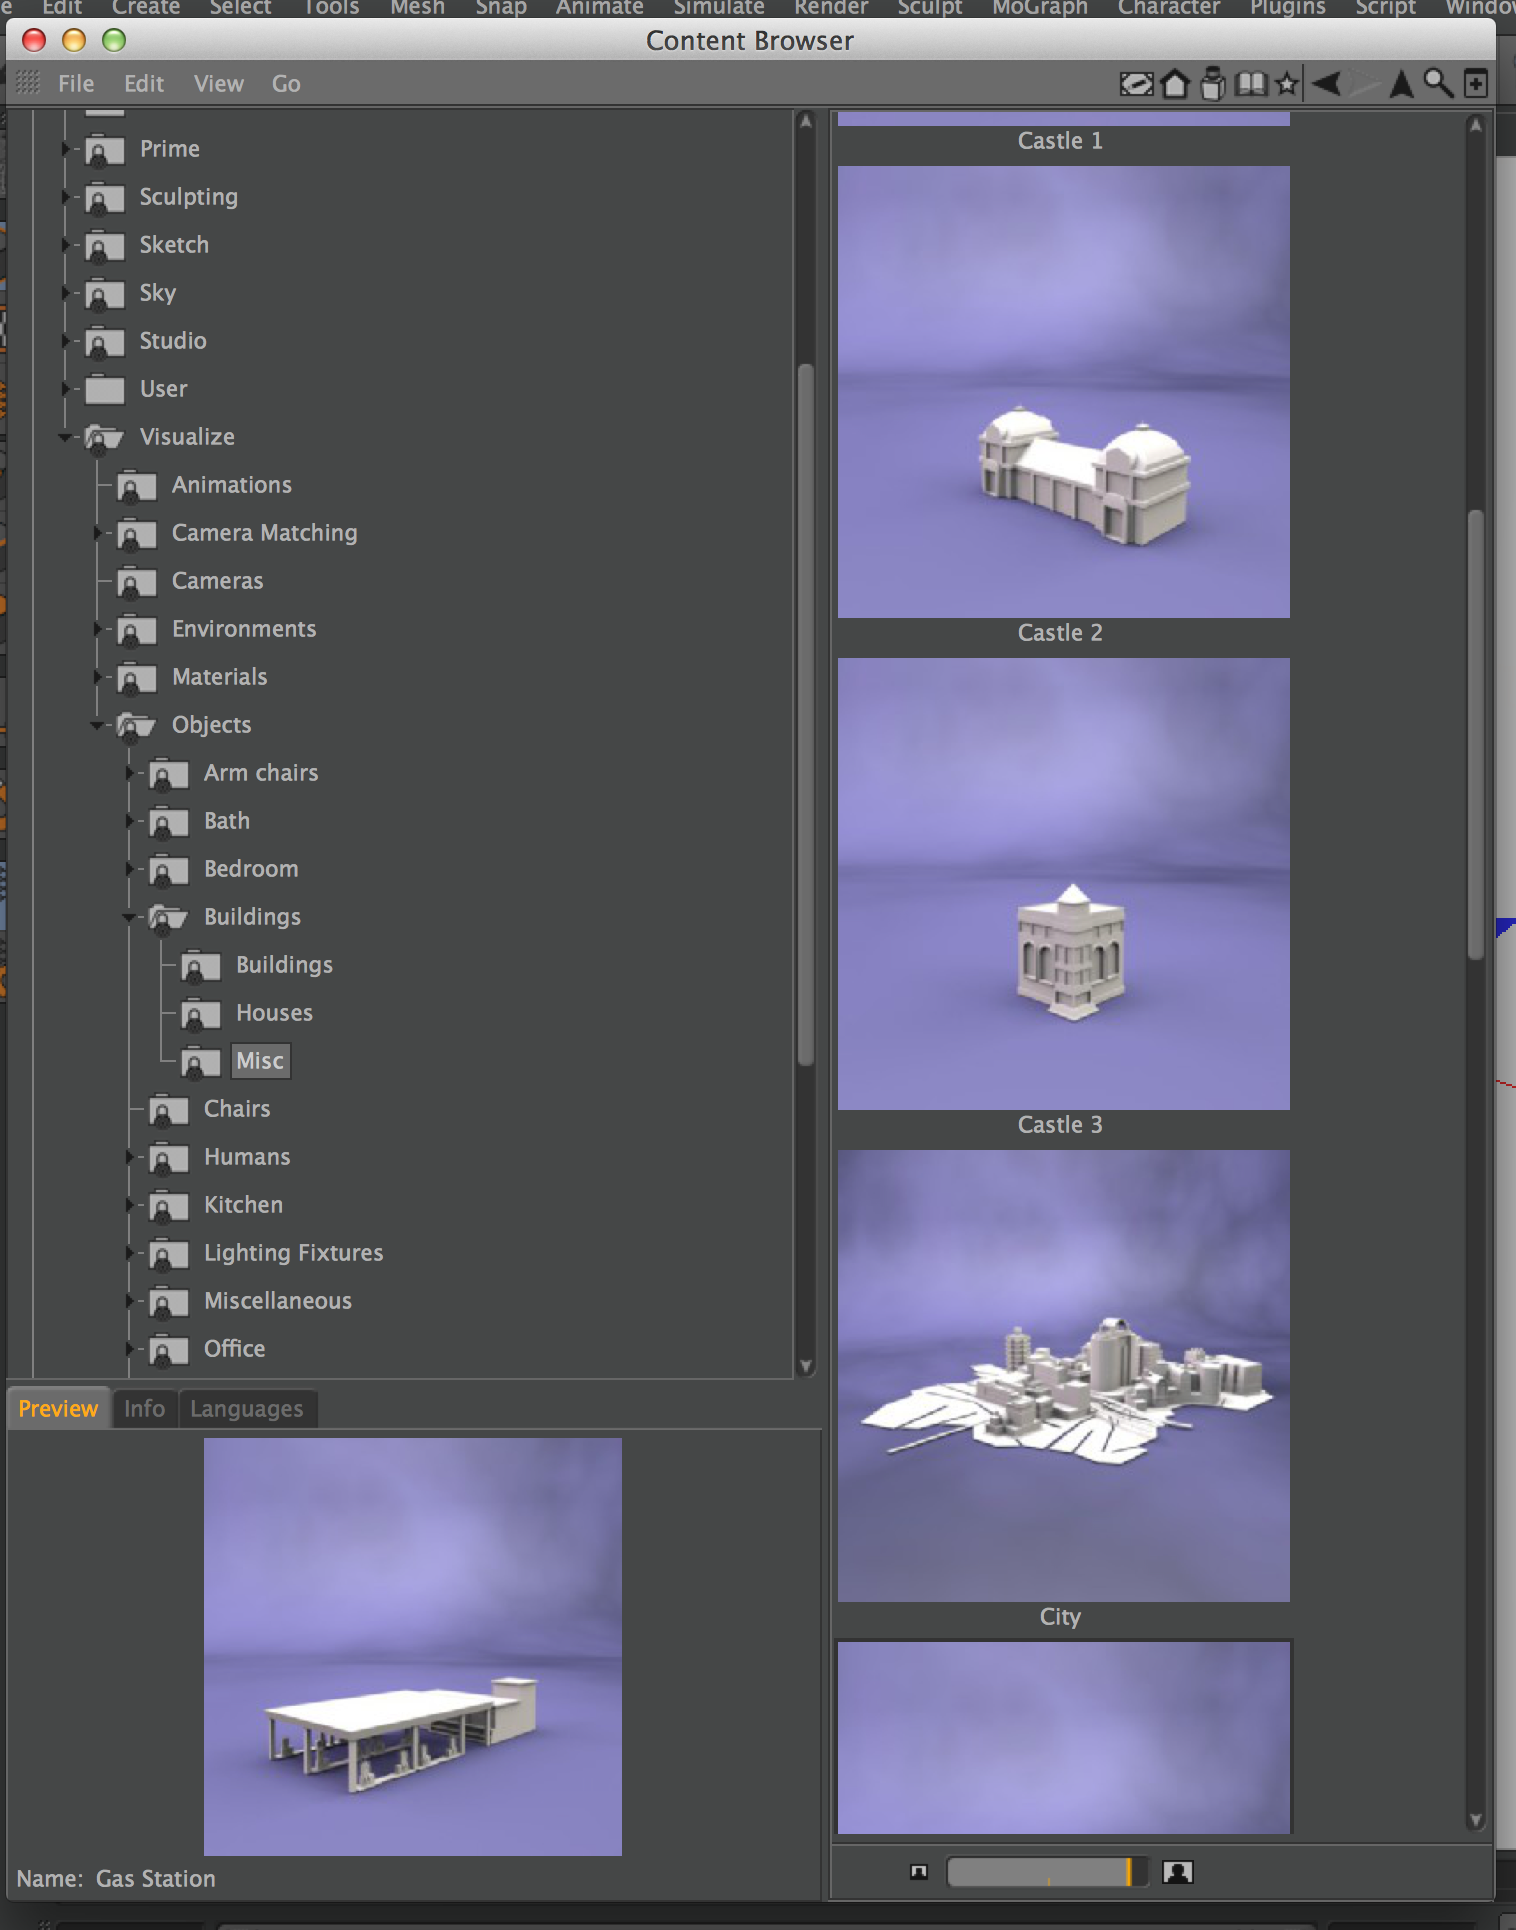
2. Go to Window>Content Browser and navigate to the Buildings folder as shown below. Double-click on the City and it will show up in your scene. Feel free to browse around and add anything other Model to the scene, just don’t Move or Scale the city. There are a lot of cool models are provided with Cinema, check them out!
 3. The Camera Target and Emitters have already been animated in the scene, if you double-clicked the City, the emitter should travel down the road, stop and then go down the other road. Don’t alter or change this animation!
4. Put a Target Camera in the scene by holding down the Camera icon in the top menu, and selecting Target Camera.
5. Select the Target Camera, and change it’s target to the Target provided, and that has the Emitters inside of it.
6. Now your task is to imitate the camera motion of this video, add your own lights and light animation to create a strong mood and a smoothly animated camera.
7. NOTE: The camera motion does not ‘ease in’ or ‘ease out’, it’s a smooth flowing animation. Adjust your animation Curves to make sure it matches.
Videos that will help you with this project include:
F-Curve Interpolation and F-Curves
Lighting (make sure to set Falloff for your lights, or you can’t imitate the movie)
Camera and Target Camera ( use Focal length to match the look, I did not use the default Focal length )