
PSD – EXERCISE – 3
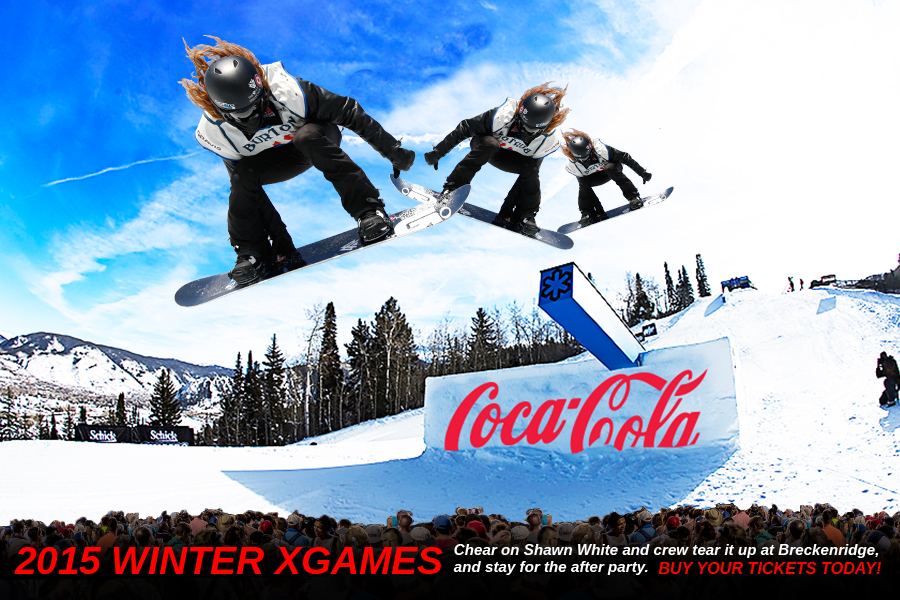
For Exercise 3, you’ll be creating the image below. Follow the steps carefully!
Step 1
- Download and unzip the file Exercise 3 to your desktop. Place it in a folder with your name followed by “exercise #3”.
- Open all of the assets in the folder entitled “exercise #3”. Look them over and compare them to the final image “Completed_Exercise_3″. Look for potential problems such as image selections, image adjustments, resizing, cropping, cleaning, etc. Begin to think about what steps will be needed and the order in which they should be carried out.
- Reminder – if you get lost, you can watch the training video, located here.
Step 2
- Close all of the images but “xgames.jpg”.
- Create a new/empty layer above your BG layer and use the Clone Stamp tool so that you don’t see the xgames banner on the snow, the snowboarder or the light under the ramp.
- In Channels, select the blue channel and create an adjustment layer to tweak the brightness of the sky. Mask out only the sky.
- Create another adjustment layer to tweak the curves in the blue channel. Make sure you only affect the sky, using the gradient tool to control your black/white on your mask. Remember – painting Black on a mask will hide the image being masked.
- Select the inverse of the sky mask, and adjust the snow/trees and everything else but the sky.
- Bring in the Coca-cola logo as a smart object, and reference the “Completed_Exercise_3″ for placement and masking.
- Save save your work as a PSD and close.
Step 3
- Open “white.jpg”
- Use whichever selection tool you think would do the best job, and cut shawn white out of the BG.
- Select Shawn White’s hair, and feather the selection to clean up any remnants that would create harsh edges. Remember – this image will be placed on a blue BG.
- Save save your work as a PSD and close.
Step 4
- Open “X-Games_Austin_2014_QE-4.jpg”.
- Using the the pen tool select all the way around the heads in the crowd. Remember that you can add, delete and move points. Also remember that you can set the rubber-band option in the drop- down menu in the options bar.
- Save the path by double-clicking on the work-path in the path dialog box.
- Select this path, and mask out the crowd from the rest of the image.
- Save save your work as a PSD and close the image.
Step 5
- Create a new Photoshop document. Make sure the document is 900×600, at 72 dpi.
- Use the following naming structure – date_excercise-3_yourname
- Save your work.
- Bring in your PSD’s as smart objects, and place based on the final “Completed_Exercise_3″.
Step 6
- Install the fonts in the “font” folder
- Using the type tool, re-create the type layers using “Completed_Exercise_3″ for placement.
- Make sure you adjust your crowd, so that the type is readable. You can do this by creating a new adjustment layer or painting black on a new layer, and adjusting with a mask.
- Save your file and close.
- Submit 4 new files through Canvas – “date_excercise-3_yourname.tiff”, “white.tiff”, “X-Games_Austin_2014_QE-4.tiff” and “xgames.tiff”
One thought on “PSD – Exercise – 3”